In this blog post, I’m going to reveal exactly what you need and show you step by step how to start your own blog. This is for many of you that have wrote in asking for more details on the basics of setting up a blog…
You may be wondering – why should I setup a blog?
For most it’s in order to start making money online and it’s a great way since you’re able to work from anywhere in the world and live the internet lifestyle without punching a time clock. I've used blogs for years as part of my SEO campaigns.
But regardless of what you’re looking for whether it’s to setup a company website, a personal blog, or setup an affiliate site – a blog is the way to go for simplicity.
The fact is for many sites, blogs are the underlying infrastructure to their site even though it may not appear to be a blog.
You have several choices – however, I’m going to make recommendations on what I’ve had the most success with.
If you're the type that prefer to watch a video, then watch the video here that shows you exactly what to do…
How to Create Your First WordPress Blog In Minutes
The recommended hosting from the video is Bluehost – click here to grab an account.
It's solid hosting for very little.
Secondly, the WordPress theme I use and you even see it here on this site is Thrive Themes.
I have the full Thrive Themes membership with access to all of the themes and plugins.
Click here to get access to Thrive Themes.
For starters, you really need to buy your own domain name and have it hosted.
There’s several free blog platforms out there – however you have little to no control.
If you’re putting the time into writing great content and develop a following online, then you need to remain in full control. And not be in jeopardy of losing your content if they shut their free service down or if they remove your blog for a complaint from competitors –
And yes this happens.
This way you’ll never be at the mercy of a 3rd party service.
The good news – starting your own blog is very inexpensive.
Step # 1 – First, you’ll need to get your own domain name.
I use Godaddy and Namecheap, but when you buy a domain, it will cost you roughly $10 per year.
Now, really put some effort into picking the right domain – this can be focused around your keyword or it can be something brandable and reflect what your blog is going to be about. For example, I named my blog Traffic Diesel because that's where my focus is – generating massive traffic and the latest internet marketing strategies -mainly revolving around SEO and traffic.
I'd also focus on getting a .com domain.
Step # 2 – Purchase Web Hosting
Now, that you’ve got your very own domain, you’ll need webhosting – this is simply what allows you to publish your blog for the world wide web to see. I recommend getting Bluehost or A Small Orange to start off with – both are very inexpensive and very easy to use and the support is like none other.
You can always graduate later however these will be sufficient to run most websites.
When you buy your hosting, be sure to hang on to the emails they sent you because it will have your login info as well as other important information.
Now that you’ve got your domain and your hosting, all you have to do now is point your domain to your hosting and let them match up. It’s very easy to do.
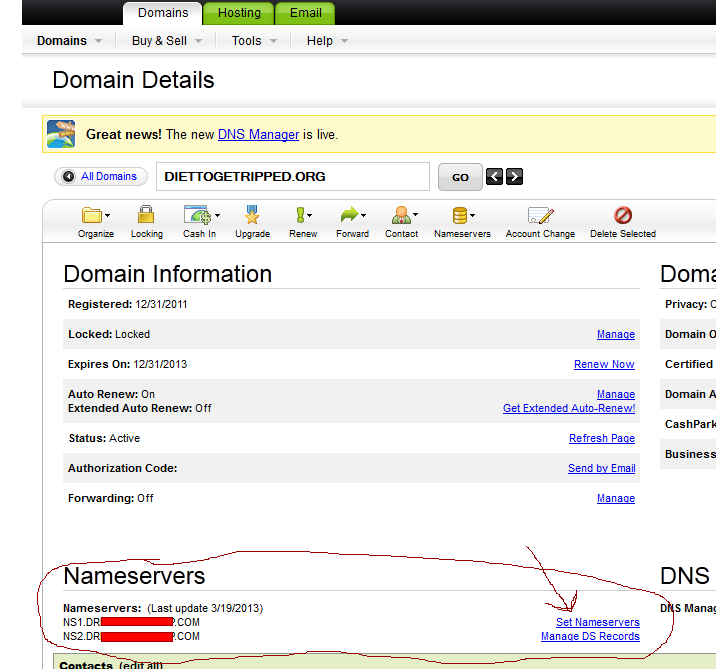
Step # 3 – Point Your Domain Nameservers to Your New Hosting Package
Just go into your Godaddy Account and click on your domain name, then look for the Nameservers field – you will see something like this –
Open a new tab, and grab the emails from your new hosting company (Hostgator, A Small Orange or Bluehost) and you want to look for your nameservers.
It should look something like this.
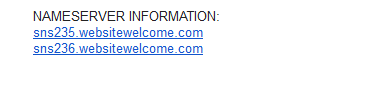
Copy the NS1.whatevernameservernameis.com
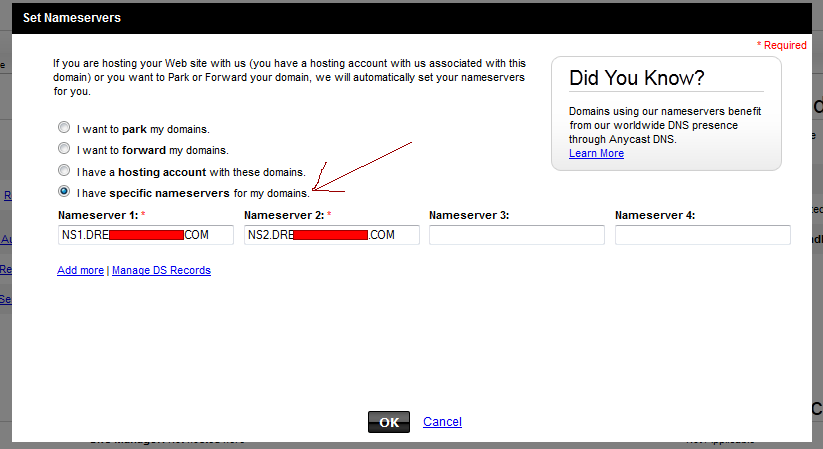
Select “I have specific nameservers for my domains.
And then past that into the fields at Godaddy as shown below and click OK:
Step # 4 – Relax For a Bit…
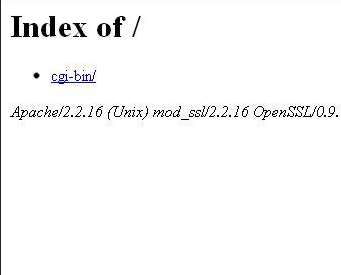
Now, step away, have a cup of coffee or your favorite brew for a couple of hours.
When you come back, type in your domain name in the address bar and you will see that it looks something like this – white screen that says Index of/ .
We’re half way there my friend.
Now, it’s time to publish your site to the world and that’s where we will use WordPress.
WordPress is the most popular blog platform and it’s actually what we’re using here on the Traffic Diesel blog. WordPress is an open source, Free software that runs on your site.
Don’t get all bogged down with the technical side of things – just know that WordPress is the underlying infrastructure. If it were a car – WordPress would be the engine.
And it’s super easy to install so don’t be worried if you’re not the tech type.
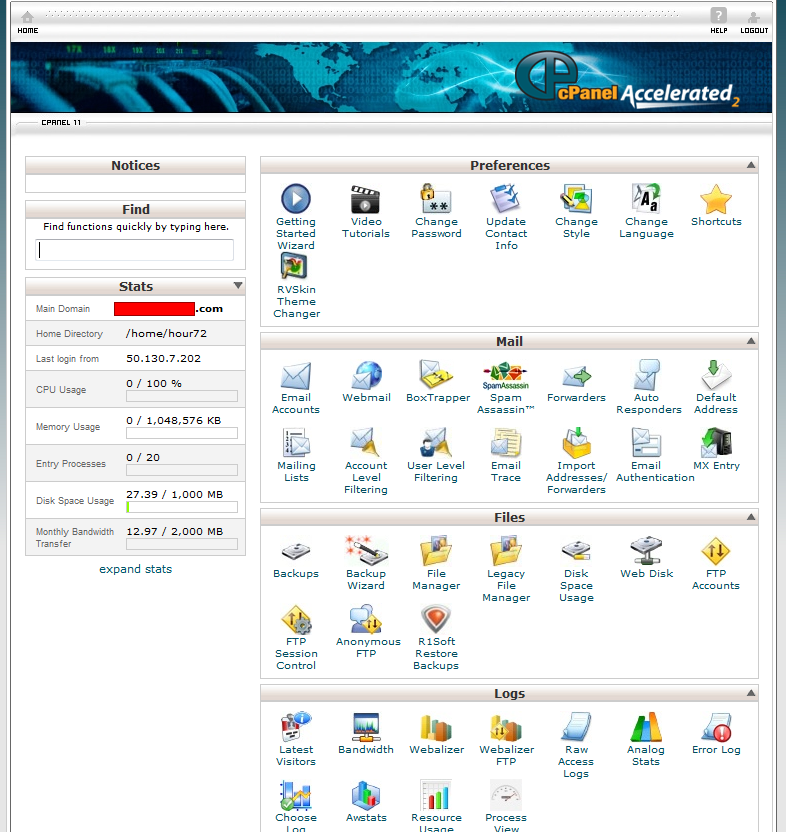
Step # 5 – Login To Your Cpanel Account
Login to your Webhost Cpanel – that info was in your login from your hosting company.
Typically its yourdomain.com/cpanel
Once you login you’ll see something that looks like this –
Next you will want to look for an icon that says Fantastico, Softaculous or a Site Software icon-
They look something like this:
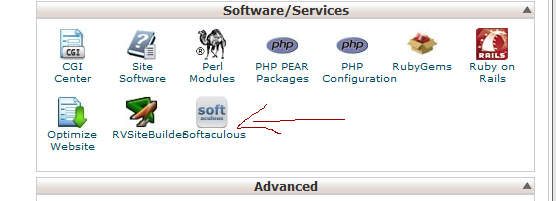
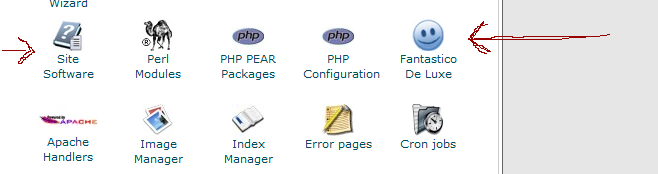
Hosting companies typically use one of these. They all work, so just pick the one you see and click the icon.
Step # 6 Install WordPress
And now we’re finally ready to install WordPress. You will see an image that looks something like this after you click on Fantastico:

Click on WordPress like I have outlined above.
Then Click on New Install –
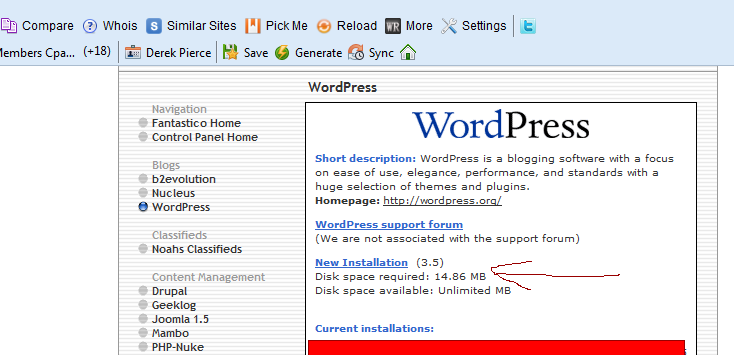
Next, you will simply fill in the fields it asks for, then click install as shown in the pictures below
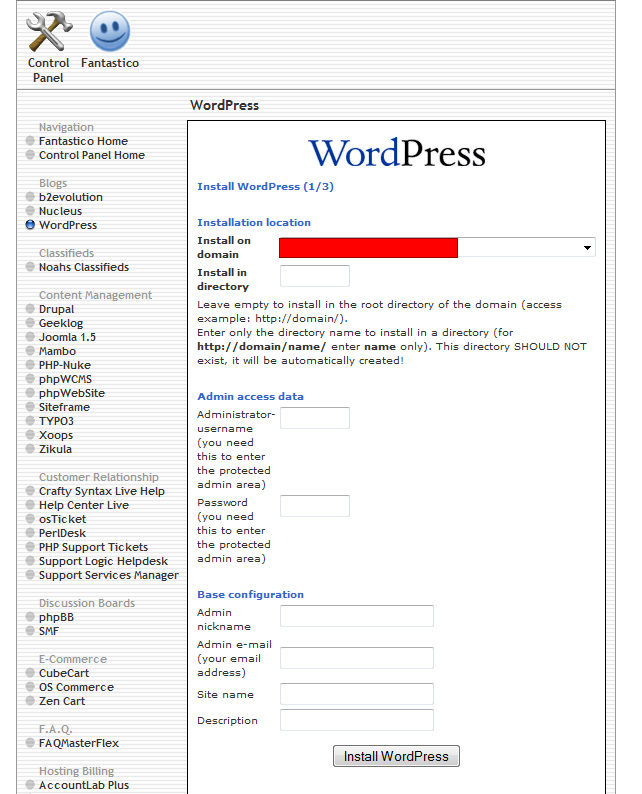
It’s all pretty self explanatory…
If you plan to install on the root of your domain – www.yourdomain.com then simply leave the directory field blank.
Next, on the admin field – do not use the word admin. Use something else – it could be something related to your keyword or your brand. If you use admin as your username – your making it easier for hackers to attack your site.
Then set up your password – come up with something better than password or 1234. I would advise to use a mixture of Capitals and numbers for your password to help prevent attacks on your site.
The admin nickname and email is self explanatory.
The Site Name and Description should be what your site is about – what your targeting. Integrate your primary keywords into your title and description. Note – the Site Title and Description can always be changed later…
Hit Install WordPress and now your site is published!
You're Now Online!
I'll be adding some more posts about how to customize your site with the use of Themes and Plugins.
If you're not familiar – WordPress allows you to install Themes – these are what gives your site a certain look.
Again, if you think of a car – this is the exterior paint of the car. I personally use a premium theme called Genesis from Studiopress. I'll be showing you why in some future trainings.
And finally, plugins are gives your site certain unique functions – these are the features.
Again, if we're using a car as an example, the plugins are the features – like heated seats, air conditioning, etc.
Anyway, in closing, I'll be showing more of these functions within WordPress. I hope you've enjoyed this tutorial for starting your first blog.
Let me know how it goes.